How to Write Code and Upload It in Mblock
mBot2 Performance Guide
Cheers for choosing mBot2!
mBot2 is an overall upgraded product. Read this guide through and follow the instructions so that you won't miss the functions of mBot2.
1. Before you use mBot2
i.i Know your mBot2
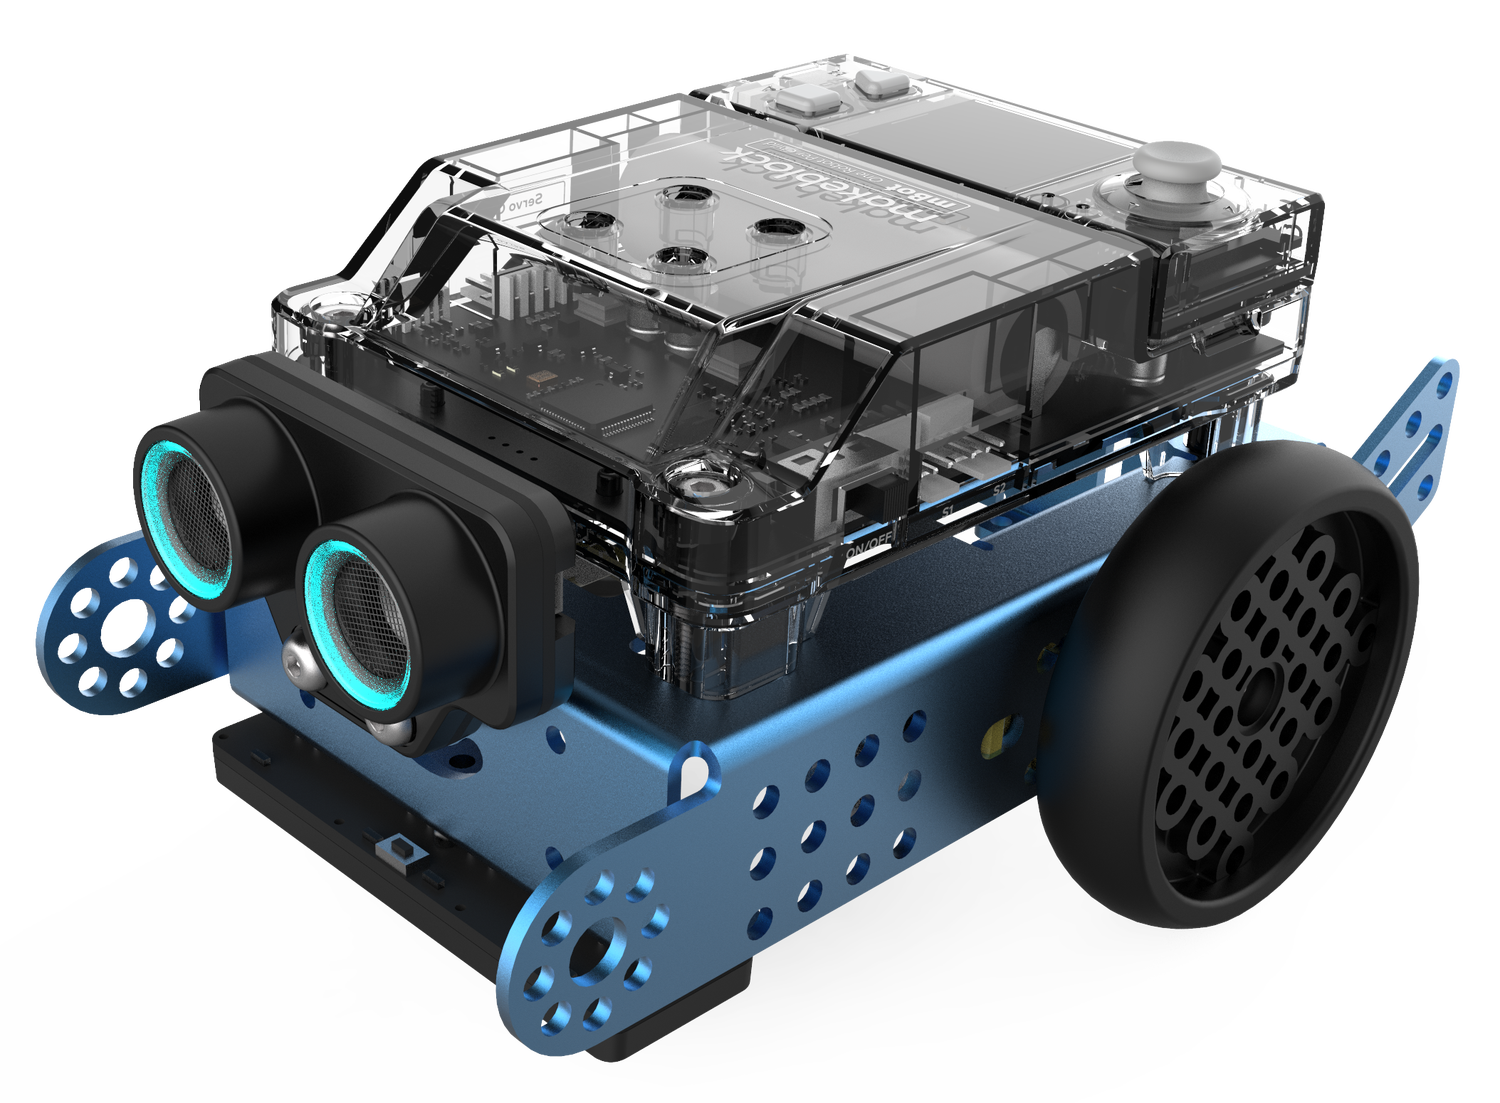
mBot2 is highly integrated and extensible. Yous tin apply information technology to design various robot projects. It tin work with Makeblock metal parts, mBuild modules, and tertiary-party electroinc modules and structural parts to extend its structures and functions.

As shown in the preceding figure, mBot2 uses CyberPi as its master control board and is equipped with multiple electronical modules, including mBot2 Shield, ultrasonic sensor two, quad RGB sensor, and encoder motors. For the functions and features of the electronic modules, see "8. More information."
1.2 Build your mBot2
You demand to build mBot2 before using it. Follow the mBot2 Quick Start Guide included in the bundle to build mBot2. Alternatively, you can read or download the mBot2 Quick Showtime Guide online or click to view 3D building.
mbot2.0_ KD010368000 (i)
http://3dbuild.makeblock.com/player/index.html?id=mbot2_0
1.3 Charging/Power supplying
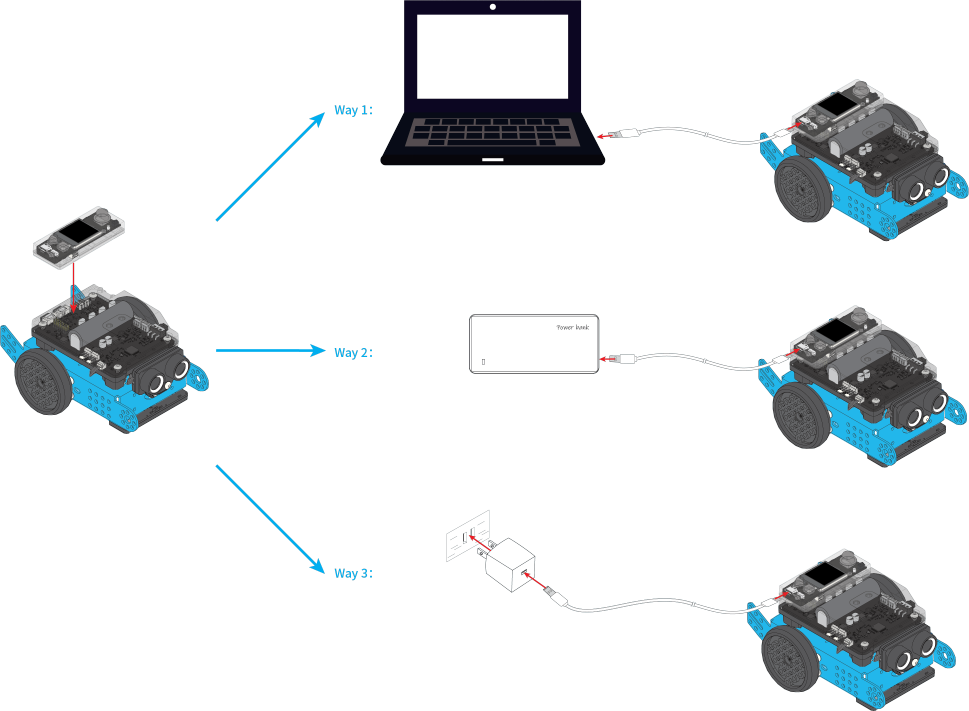
The capacity of the battery on mBot2 Shield is 2500 mAh. You need to charge mBot2 Shield through CyberPi. It can be charged while being used.
To accuse mBot2 Shield, connect information technology to CyberPi kickoff, and and then use a USB cablevision (Blazon-C) to connect CyberPi to a computer, power bank, or charger.
 Caution
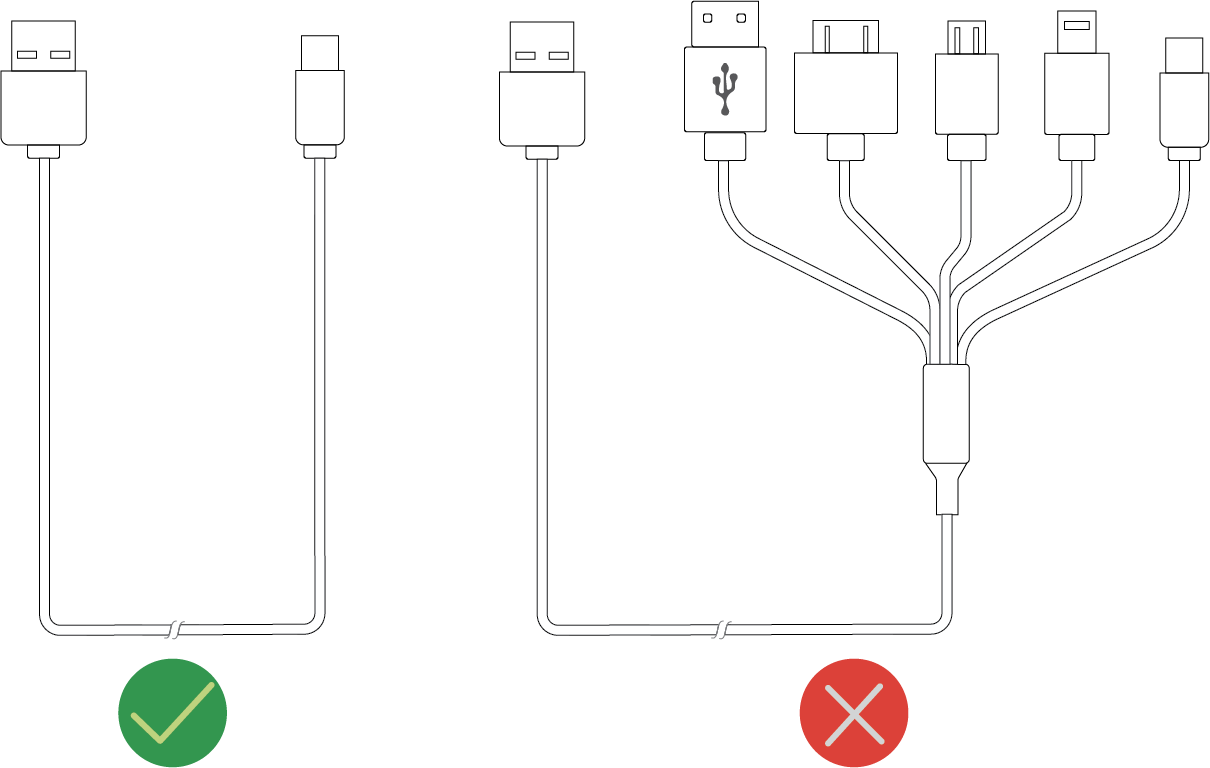
- Max. input voltage/current: 5V/1A
- Practise NOT use a multi charging cable to charge mBot2 and another device at the same fourth dimension. Otherwise, mBot2 may be damaged.
The following table describes the charging and power supplying of mBot2 Shield.
| Battery life Supplies ability for mBot2 with loads, such equally servos and motors, in common application scenarios. | ii.5 hours–5 hours When mBot2 keeps moving or keeps operating with loads: ii.5 hours |
| Upper limit of bombardment life mBot2 operates in the slumber mode with the screen off. | More than 24 hours |
| Fourth dimension to fully charge the battery | 1 60 minutes–two hours |
ane.4 Set the arrangement linguistic communication
To change the system language, enter the CyberOS system on CyberPi. For details, run across "Set the arrangement language" in the CyberPi Performance Guide.
2. Use the preset programs
2.1 Restart mBot2.
Before running a preset program, turn mBot2 off and so turn information technology on to ensure that information technology is restarted.

2.2 Enter CyberOS.
CyberPi automatically enters CyberOS after you restart mBot2. If it doesn't, printing the Abode push on CyberPi.

2.3 Choose and execute a program.
Take program 1 as an example.
Move the joystick downward to choose Switch Program, choose Program1, and press push button B to execute the program.

Follow the instructions to execute the program.
Note: You can printing the Domicile button to return to the homepage of CyberOS and choose to execute another preset plan.
iii.Apply mBlock 5 to program mBot2
This section describes how to implement the functions of mBot2 by programming it with mBlock 5.
iii.ane Download and install the required software
Currently, CyberPi supports the block-based graphical programming and Python programming. Make certain that you take downloaded and installed the required software.
| Language | Editor | mBlock 5 version | Required software | URL accost |
| Scratch, MicroPython | mBlock Block-based Editor | PC client on Windows/Mac | mBlock 5 for Windows mBlock v for Mac | Northward/A |
| Web version on Windows/Mac | Google Chrome mLink2 for Windows mLink2 for Mac | https://ide.makeblock.com/ | ||
| Scratch | mBlock Block-based Editor | Mobile app | mBlock five app | Utilize your telephone or tablet to browse the QR code: Alternatively, search for "Makeblock" in app stores. |
| Python, MicroPython | mBlock-Python Editor | Web version on Windows/Mac | Google Chrome mLink2 for Windows mLink2 for Mac | https://python.makeblock.com/ |


3.2 Add and connect mBot2
- Open mBlock 5. Open mLink2 if you are to use mBlock 5 on the web.
- Use a Micro USB cable (Type-C) to connect mBot2 to your PC, and power on mBot2.
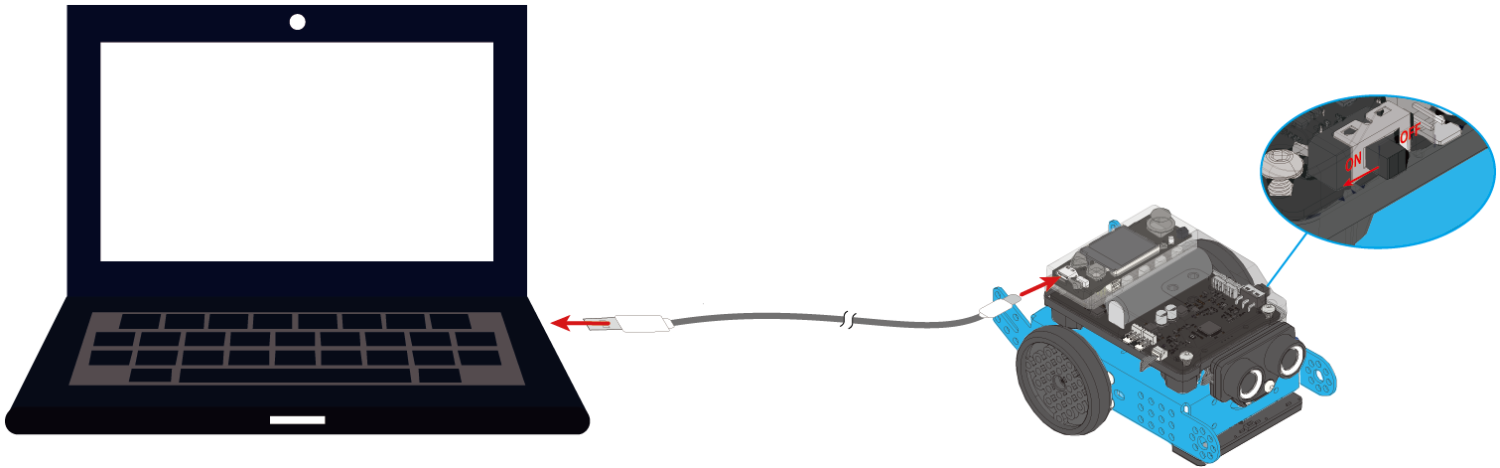
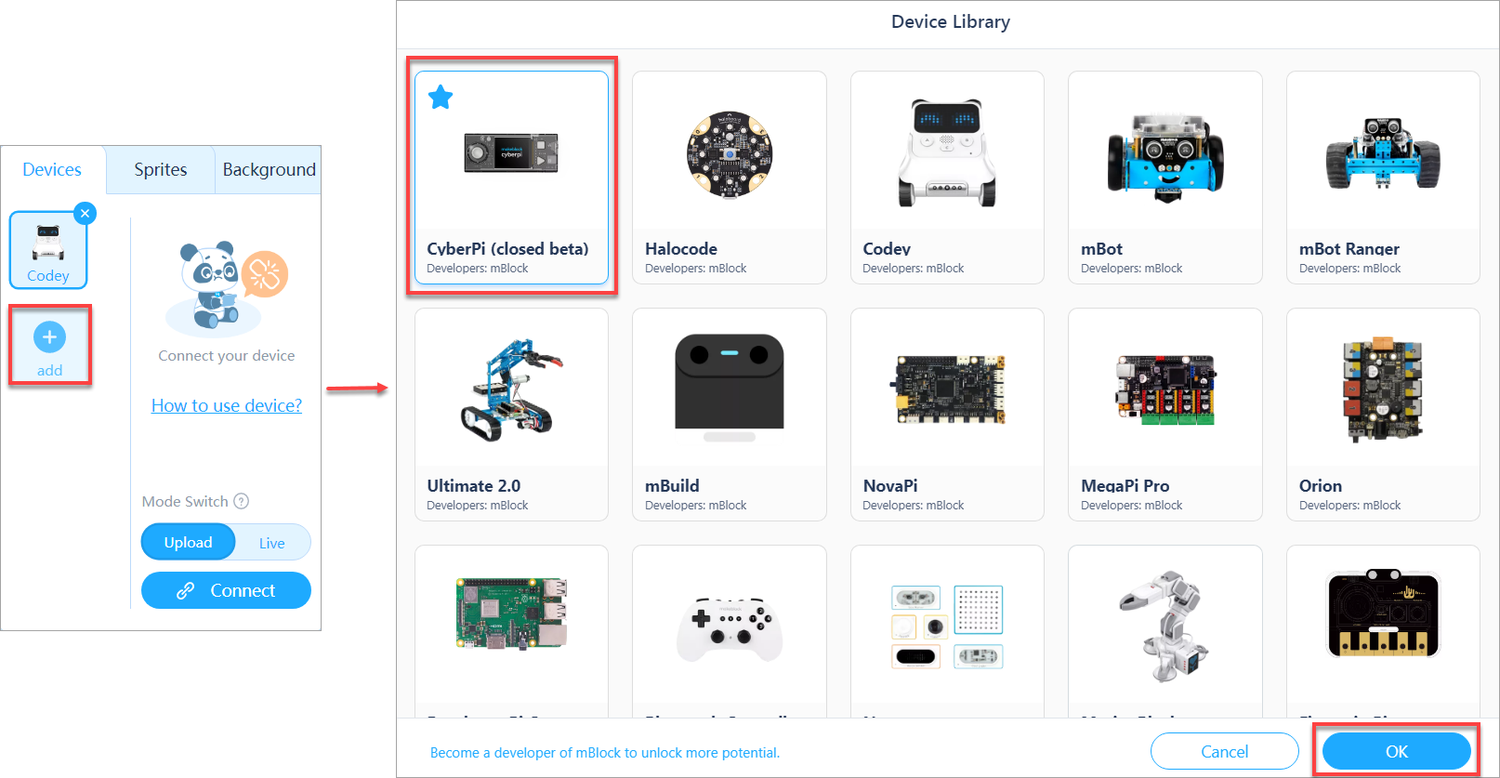
- Click + add together on the Devices tab, select CyberPi in the device library, and click OK .
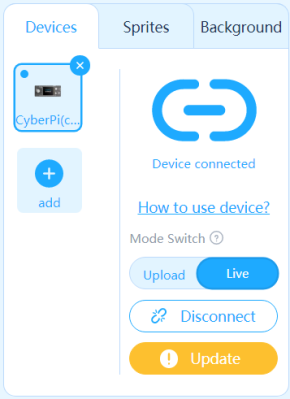
- Click Connect to connect CyberPi to mBlock 5.

Note:
If the version of mBot2 you lot got is delivered with a wireless adapter, you can connect mBot2 to mBlock 5 wirelessly by referring to "Wirelss Adapter."
mBot2 tin be connected to your PC directly through the Bluetooth adapter of your PC. To determine whether your PC or mobile device meets the requirements for direct Bluetooth connection, see "Bluetooth Compatibility."

A message is displayed after CyberPi is connected, indicating that the connection is successful.

iii.3 Bank check the firmware version
Notation: Before you programme and use mBot2, bank check its firmware version. If the firmware version is not the latest one, update it.
After yous connect mBot2 to mBlock 5 through CyberPi, if a firmware update prompt is displayed, as shown in the following effigy, it indicates that the firmware version is not the latest one.
Click Update to update the firmware.
3.four Add extensions
ane. Add together the mBot2 extension.
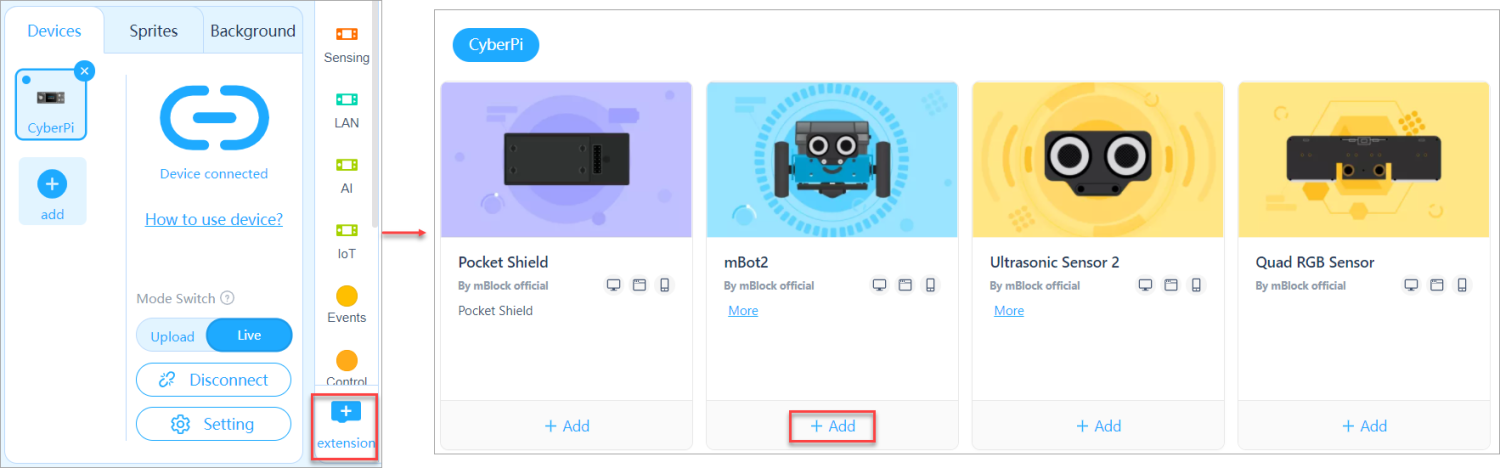
two. Add the Ultrasonic Sensor 2 extension.

iii. Add together the Quad RGB Sensor extension.
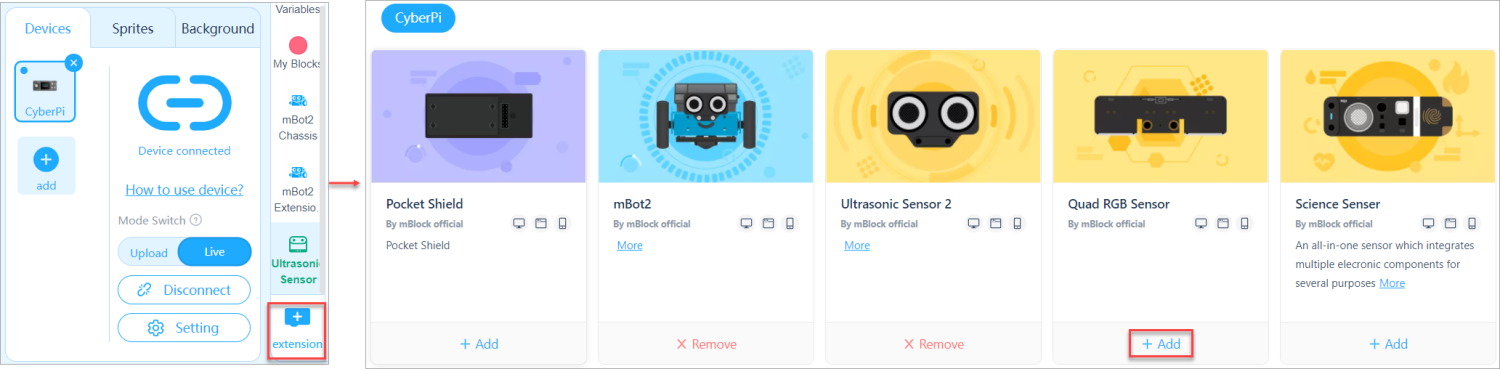
Later adding the extensions, you lot can see the blocks provided for mBot2.

Now, you can start to plan mBot2!
3.5 Set the programming mode
mBlock 5 provides two programming modes, namely Live and Upload. You can click to switch the modes.

Alive: In this mode, you tin can view the program execution event in real fourth dimension, which facilitates the debugging of the program. In this manner, y'all must proceed CyberPi connected to mBlock 5. If they are disconnected, the program cannot be executed.
Upload: In this mode, you demand to upload the compiled program to CyberPi. After being successfully uploaded, the program tin can still run properly on CyberPi when it is asunder from mBlock 5.
iv. Example programs
You tin sympathise the functions of mBot2 through example programs.
On mBlock 5, choose Tutorials > Example Programs and click mBot2 to view example programs provided for mBot 2.

v. Tips for using mBlock 5
5.1 Block comments
You lot tin can read the block comments in an example plan to amend understand its function and operation.

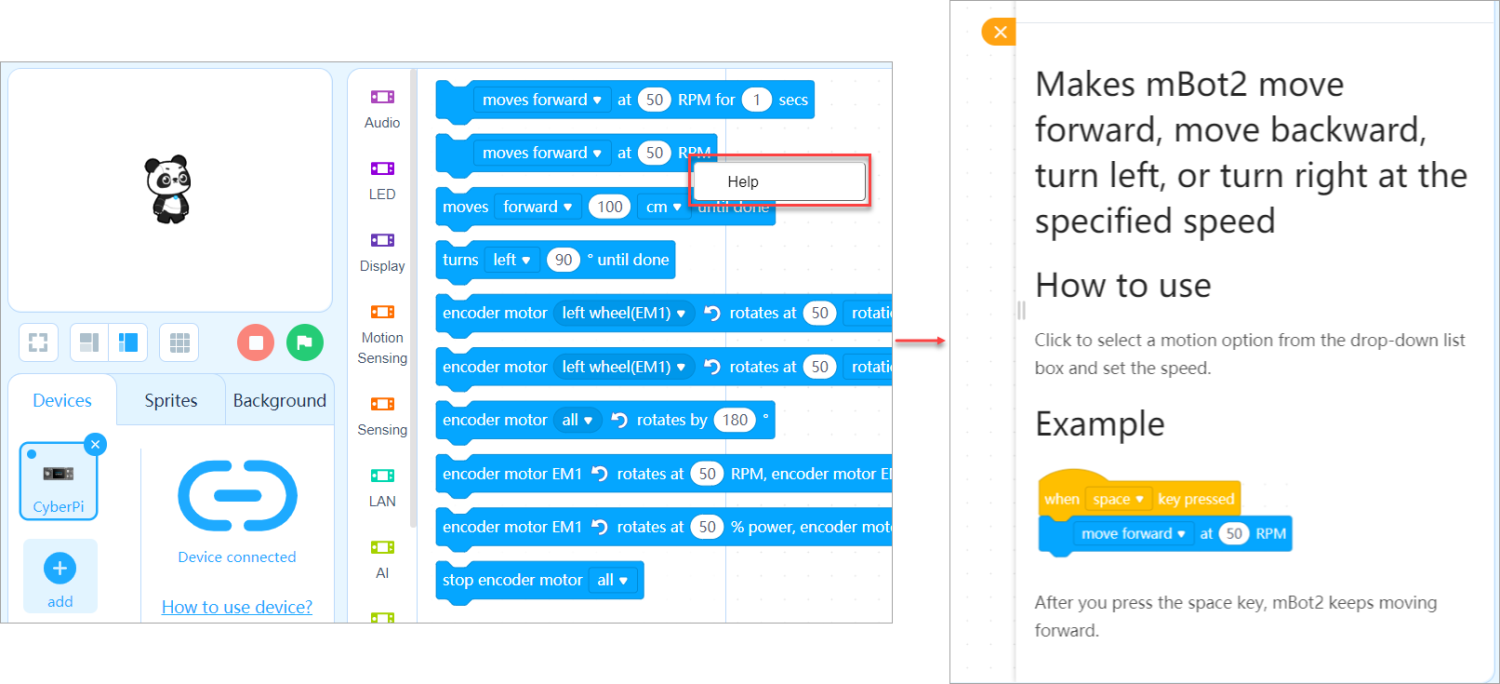
v.2 Block assistance
If you don't understand a cake when using it, you tin right-click it and click Help that appears.
5.3 Learn Python based on blocks
mBlock 5 provides two programming languages for mBot2, namely block-based programming and Python. In Upload mode, you can click the buttons on the right to switch the programming languages.

In addition, when programming mBot2 in Upload mode, yous can click the switching button on the right to view the corresponding Python statements (obtained by converting the blocks).

Note: You can run across Python API Documentation for mBot2 Shield to know about more than functions of CyberPi and mBot2.
6. Python programming
Open mLink2 and click Create at present in the mBlock Python editor department.

For details well-nigh how to program mBot2 on mBlock-Python Editor, run into mBlock-Python Editor Online Assist.
vii. Feedback and suggestions
Should you take any feedback or suggestions on CyberPi and mBot2, contact our R&D team through:
support@makeblock.com
8. More data
mclaughlinsplaccut.blogspot.com
Source: https://education.makeblock.com/help/mbot2-start/
0 Response to "How to Write Code and Upload It in Mblock"
Postar um comentário